

How To Convert Picture To Line Drawing
Illustrations can enhance the style and appeal of your ecommerce site. Nevertheless, creating illustrations (or hiring skilled illustrators) tin exist plush and fourth dimension-consuming.
Thankfully, y'all tin learn how to turn a film into a line drawing in Photoshop CC 2022 following the steps below. Images of objects isolated on a white groundwork piece of work best for this technique, making this a great choice for modifying or enhancing product photos.
Receive gratuitous ecommerce & product photography tips
Before yous begin: How to outline an image in Photoshop
If you want to turn a photo into a pencil sketch in Photoshop, but you don't desire information technology to look like y'all did it in Photoshop, yous'll need to pay attention to detail and prepare your image properly before you utilize any filters.
In the following tutorial, we'll go over one method that shows you how to convert your paradigm into a pencil sketch flawlessly, and then we'll discuss specific tools you tin can explore to achieve other image outlining furnishings in Photoshop.
Not all photos are the aforementioned, and then you'll need to use your sentence as you adjust filters, blurs and layer opacities each time y'all use Photoshop to convert a photo into a line cartoon using the steps beneath.
How to turn a motion-picture show into a line drawing in Photoshop
- Suit the dissimilarity of your photograph
- Set upward your layers
- Catechumen the image to grayscale using an adjustment layer
- Convert your photo to a line drawing
- Set your Background and Foreground colors
- Add together Pencil Shading to your image
- Add a cantankerous-hatching effect to your image
- Make your final tweaks
Step ane: Adjust the contrast of your photo

In the example photograph, the image of the shoes and sunglasses contrast significantly confronting the white groundwork. The prototype of the change purse and perfume tube, all the same, are so calorie-free they almost blend into the background.
We'll arrange the contrast of the unabridged photograph so the handbag and tube stand out more.
Get to your Layers panel and brand certain the layer that contains your image is selected. If you're working in a flattened image (such as a JPG), this layer will be the locked Groundwork layer.

Choose Prototype > Adjustments > Curves from the dropdown menu at the elevation of Photoshop's awarding window.

The Curves dialog box volition announced. Make sure Preview is checked.
In the graph on the left side of the dialog box, click on the middle of the line running diagonally through the graph and drag downward, creating a curved line in the graph. You'll observe that the nighttime areas of the paradigm volition get darker, while the lighter areas volition remain lite.
Notation: If yous're working in a CMYK image, you'd pull up on the middle of the line instead of downwards.

In one case yous're satisfied with the increased contrast of the image, click OK.
Step ii: Prepare up your layers
In your Layers panel, duplicate the layer containing your image iii times, then that you lot have 4 identical layers.
To indistinguishable a layer, select the layer in the Layers panel, click on the Layers panel menu in the upper right hand corner of the panel, and choose Indistinguishable Layer.

Step three: Catechumen the epitome to grayscale using an adjustment layer
Select the duplicated layer at the summit of the Layers panel.

Select the Adjustment Layer icon at the bottom of the Layers panel (the icon looks like a half black, half white circle). Choose Hue/Saturation from the dropdown menu.

Yous've only created an aligning layer for Hue/Saturation, which ways all layers that appear beneath the adjustment layer will retain the Hue/Saturation properties you prepare for that adjustment layer.
With your adjustment layer still selected, go to your Properties panel, located to the right of your image by default. If you lot don't run into your Properties panel, you can cull Window > Properties from the dropdown carte du jour at the superlative of the Photoshop awarding window.
You'll see three sliders in the Backdrop panel: Hue, Saturation and Lightness. Drag the slider for Saturation equally far as it volition go to the left, so that the value listed for Saturation is now -100.

Your image now appears grayscale.
How to catechumen an image to grayscale: an boosted method
Having the Hue/Saturation adjustment layer makes your paradigm appear grayscale, only if you want to eliminate all color completely from your prototype as you work, yous tin convert your prototype to grayscale by choosing Epitome > Mode > Grayscale from the dropdown menu at the acme of the application window.
If you have an adjustment layer in place when y'all convert to grayscale, the aligning layer will be deleted.
Step 4: Convert your photo to a line drawing
In this stride, you'll learn how to outline, or trace, the film in Photoshop using a series of layer effects. If your goal is to create just an outline of your photograph, you lot may decide your moving-picture show is complete after this step.
Brand your superlative ii duplicated layers invisible by clicking on the heart icons next to the layers in the Layers panel. And then select the visible layer that is 2d from the bottom of the Layers panel.
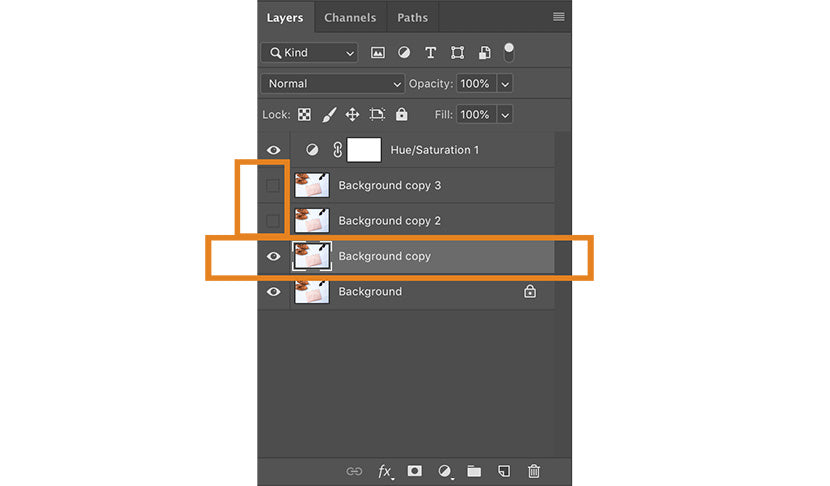
Click on the dropdown menu at the pinnacle of the Layers panel next to Normal. Select Color Dodge.

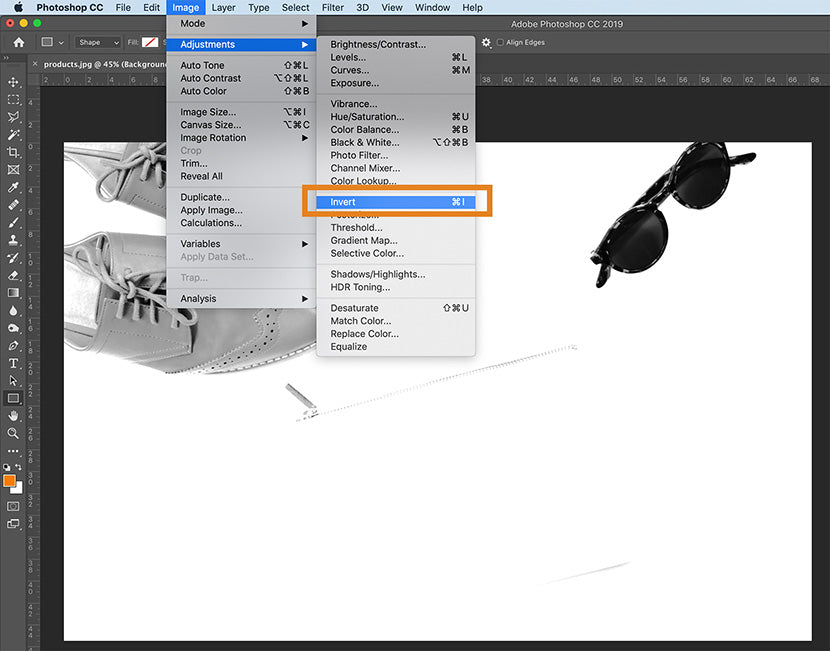
With the same layer still selected, invert the epitome past typing CTRL+I (Control+I on a Mac). You tin can besides invert the image by choosing Paradigm > Adjustments > Invert from the dropdown menu at the top of Photoshop'south application window.
Side by side, choose Filter > Mistiness > Gaussian Mistiness from the dropdown menu at the top of the application window.
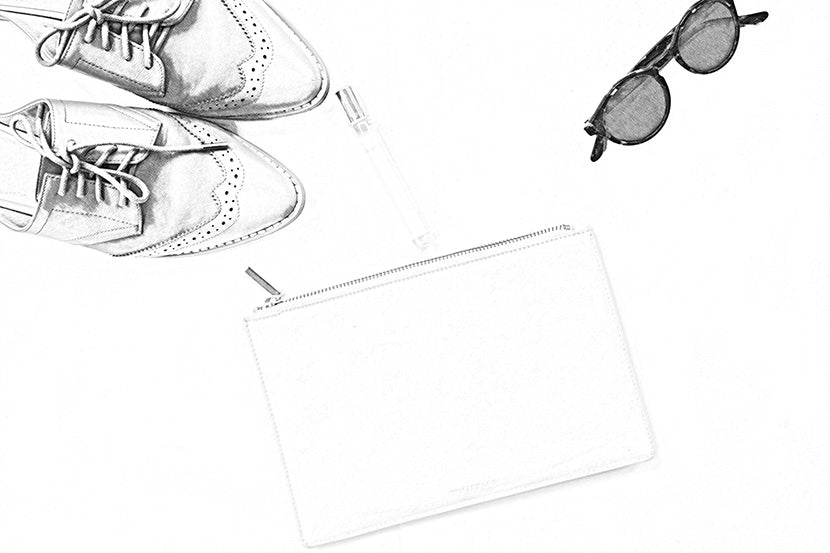
In the Gaussian Blur dialog box that appears, suit the slider until your image looks like a line drawing.
Moving the slider the left will result in thinner lines; moving the slider to the right and increasing the blur will thicken and darken the lines, and add together some shading to the epitome.
Make sure that Preview is checked in the dialog box and then that yous tin see how the image changes as you motion the slider to the correct or to the left.

How to make the strokes of your line drawing thicker in Photoshop
If you want to thicken the strokes of your line drawing, duplicate your original layer ane more time and motility the new layer above the layer you just adjusted (layer with Color Dodge alloy mode).
Choose Filter > Filter Gallery... from the dropdown menu at the top of the application window.
Choose Glowing Edges nether Stylize. Here, you lot can adjust the Border Width on the right-hand side of the window. Reducing Edge Effulgence will issue in a cleaner edge.
Click OK.

Back in your layer, click CTRL+I (Command+I on a Mac) to invert the layer, and change the layer blend mode to Multiply.
The outlines of your image will now be thicker and darker.
Pace 5: Fix your Groundwork and Foreground Colors
In your Toolbar, set your Background Color to white past double-clicking on the Groundwork Color icon. In the Color Picker (Background Color) dialog box, click on the upper left-manus corner of the large color box.
Next prepare your Foreground Color to a medium gray. Double click on the Foreground Color foursquare in the Toolbar. In the Color Picker (Foreground Color) dialog box, click midway down the left side of the large color box.
Other colors in the large color box (such as the blues and reds visible in the Color Picker panel image below) are irrelevant since you lot're keeping the cursor all the way to the left side of the large color box.

Related: ix alternatives to white background production photography
Step 6: Add Pencil Shading to your prototype
In the Layers panel, select the layer above the layer you simply worked with. Click on the eye icon to make the layer visible over again. Your paradigm volition now look like a black-and-white photograph again.
Cull Filter > Filter Gallery... from the dropdown menu at the top of the application window.

In the Filter window, click on the folder marked Sketch and choose Charcoal.
Adjust the Charcoal Thickness, Detail, and Light/Dark Rest sliders until the epitome in the preview window has the appropriate amount of detail. Remember, you already have a line cartoon of the photo in a lower layer, and so you only need to create shading in this footstep.
Click OK.

In the Layers panel, click on the dropdown carte du jour next Normal and adjust the Layer Blend Mode of the charcoal layer to Multiply.

Footstep 7: Add together a cross-hatching consequence to your image
In the Layers panel, click the eye icon on the top layer to make the layer visible. All layers should now be visible in your image.
With the last layer selected, choose Filter > Filter Gallery... once more from the dropdown menu at the superlative of the awarding window. If you lot see the Filter Gallery option more than than in one case in the dropdown, make sure you select the lower option.

In the Filter window, click on the choice marked Sketch and choose Torn Edges. Adjust the toggles on the right-paw side of the window until y'all tin can see the details of your image.
Once y'all're happy with the appearance of the Torn Edges filter, click on the New icon located at the lower correct-mitt side of the Filter window. (This icon looks like a piece of paper with a folded corner, just like the New Layer icon in the Layers panel.)

Y'all'll encounter Torn Edges announced twice in the correct-hand side of the Filter window. While the elevation example of Torn Edges is still selected, click on the Graphic Pen filter and change the Stroke Diagonal to Left Diagonal.
You lot tin also adjust the sliders for the Graphic Pen filter until you're satisfied with the prototype in the preview window. Equally with the previous layer, you're only creating shading at this phase.

Click OK.
Change the Layer Blend Mode from Normal to Multiply as you did with the previous layer.

Finally, considering the graphic pen filter is crisper than the charcoal filter we applied to the lower layer, nosotros'll add together a slight motion blur.
With the same layer nonetheless selected, choose Filter > Blur > Motion Blur from the dropdown menu at the height of the awarding window.

In the Motility Blur dialog box, set the bending to -45° and move the Distance slider to the left to create a very slight blur. Make certain Preview is checked so you lot can come across the blur earlier you apply it.

Click OK.
Step 8: Make your final tweaks
Yous're not done yet! Playing with the opacity of your layers and cleaning up any dark spots that you see in your image volition put the final touch on your new pencil sketch.
Adapt opacity of layers
You lot can adjust the opacity of the pinnacle two layers to reduce the intensity of the pencil shading.
In the image below, the top layer's opacity is reduced to threescore% and the next layer down has an opacity of 70%.

You lot should not suit the opacity of the lesser two layers every bit doing and then could undermine the line drawing issue you take created.
Clean up any artifacts
In the example image, in that location are several places where the white background looks every bit if it has smudges, or dark spots.
In order to remove dark spots such as these, stamp the layers by selecting all layers, including the Hue/Saturation aligning layer, within the Layers panel. Type CTRL+A+Due east (Command+OPTION+E on a Mac) to create a stamped layer, which volition announced at the top of your Layers panel.

Set your foreground color to white in the Toolbar and choose the Brush tool from the Toolbar. Inside the new stamped layer, carefully pigment over any smudges using the brush tool.
Are you aware of all of the tools bachelor in Photoshop CC 2022?
Your finished image volition now look like a pencil sketch.
At present that you know how to turn a picture into a line drawing in Photoshop, be sure to cheque out our other Photoshop tutorials to master your skills.
Browse Photoshop tutorials and fine tune your paradigm-editing skills


Source: https://pathedits.com/blogs/tips/how-turn-photo-into-pencil-sketch-with-photoshop
Posted by: whitesidewheark.blogspot.com
0 Response to "How To Convert Picture To Line Drawing"
Post a Comment